Over the past couple of months I’ve found that postings of bloggers I follow are not always coming up in my WordPress Reader. One of those missed postings is Raj’s photo lesson on lenses. In that xdrive photo lesson Raj invited us to “really access the capabilities of your camera and find out what exactly is your stumbling block, is it a camera or a lens?”
So with this lesson in mind along with the recent discussions about photographing in raw, I set out on three separate nature walks with a different lens on each occasion.
On the first day of this assignment I used a Nikon 28-300mm f/3.5-5.6G ED VR lens with a Tiffen 0.6 neutral density lens.
This first image is a representation of the raw image. I see this image as a bit underexposed.
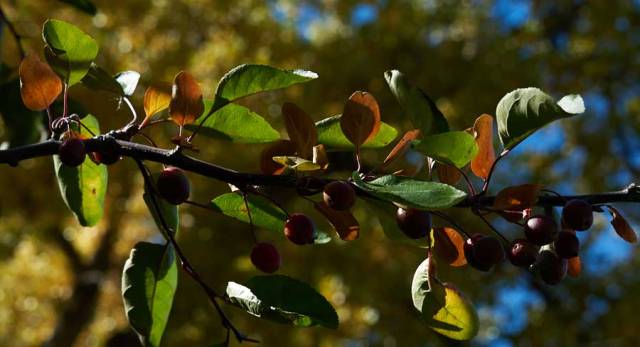
Nikon D750 f/9 1/40s 55mm ISO 100
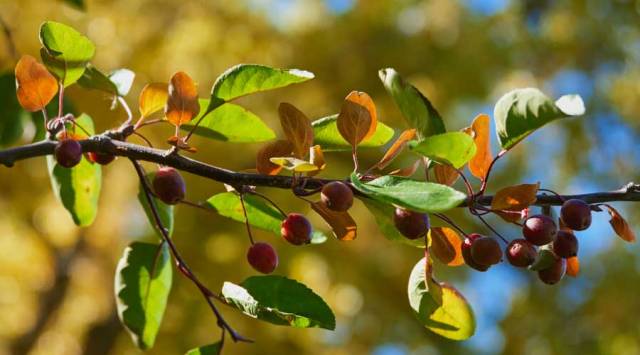
This second image was created with Raj’s discussion regarding the consideration of sharpening and color saturation within the initial editing of raw images in mind.

Nikon D750 f/9 1/40s 55mm ISO 100
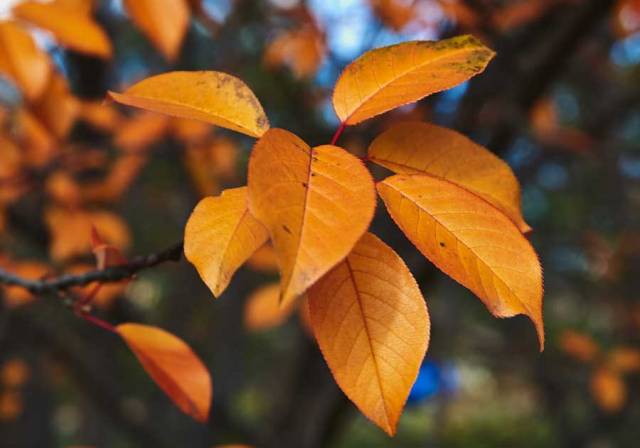
While I love bokeh – the way the lens renders out-of-focus points of light – I experimented with opening up the f-stop to explore Raj’s recommendation that an “open aperture would have created better isolation of leaves.”
Nikon D750 f/4.5 1/100s 55mm ISO100
During the second day of this assignment I used a Nikon AF-S DX 35mm f/1.8G lens with a Platinum natural density lens.
The first image is a raw representation prior to any editing. This image seems a bit muted.
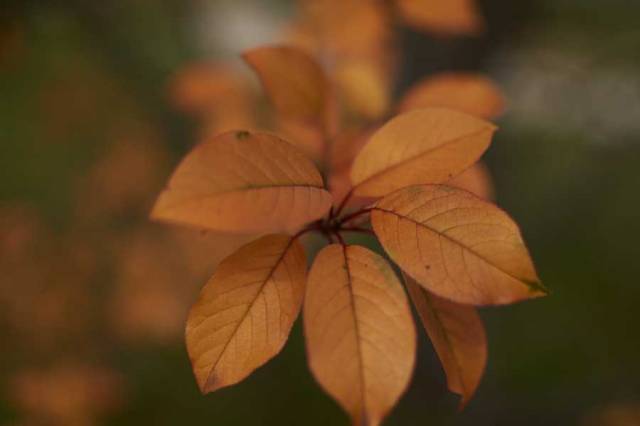
Nikon D750 f/1.8 1/1000s 35mm ISO 100
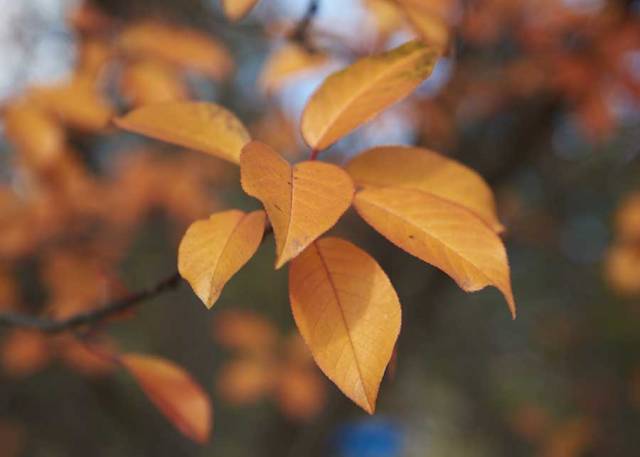
This second image was again edited with the intentional inclusion of sharpening and color saturation. As Raj noted an open aperture does allow for a greater isolation of the leaves. The f/1.8 setting also seems to offer a softness to the image as well as gentle depth of field.

Nikon D750 f/1.8 1/1000s 35mm ISO 100
In my limited experience and knowledge I find that a prime lens invites me to zoom in using my legs which is okay when photographing leaves…but not so much during street photography.

Nikon D750 f/7.1 1/60s 35mm ISO 100
On the third day, I set out with a Nikon AF-S 24-85mm f/3.5-4.5 G ED VR lens.
A raw representation prior to editing. Again, muted.
Nikon D750 f/4.2 1/125s 56mm ISO 100
In the edited f/4.2 image the shadows on the leaves are brought out; yet, I find the background a bit distracting. Sharpening and color saturation was also intentionally included in the editing process.

Nikon D750 f/4.2 1/125s 56mm ISO 100
In the f/7.1 image below the detail and sharpness of the leaves seems to offer a greater isolation of the leaves and isn’t as distracting as in the f/4.2 image. Also, it is interesting to note that both images have a bit of bokeh.
Nikon D750 f/7.1 1/80s 56mm ISO 100
Over to you Raj…I am finding great value in your lessons and feedback. Thank you for expanding my understanding of this never-ending learning experience.

interesting study, thanks for posting. The takeaway for me is that raw files always need some editing (either in Camera Raw or Lightroom Basic Panel) before conversion to JPG before posting to a blog.
Thank you for visiting and leaving your thoughts. My reading of a photography article also noted the value of white balance, exposure, as well as, shadow and highlight recovery editing of raw files that I didn’t mention in this post. I think Raj’s latest lesson furthers a discussion of raw and jpg editing.
You are totally right Brenda. Basically one has to touch upon each of the adjustment areas you mentioned. Raw is just the impression of sensors version, no AI involved at all. So all the work has to be done by us.
A great series of this lesson. I scrolled up and down a few times and read carefully of your explanations. Thank you for providing the details and these beautiful images. I can see the differences here, but did wonder the sharpness and colors of the f4.2 photo after editing. I thought it’d be softer since it was take with f4.2 and f7 would be sharper, yet it looks beautiful. 🙂
These two images are a bit of a puzzle to me but with some additional reflection I think that as I did not use a tripod and relied on auto focus the two images may have additional differences that I did not take into consideration. The autumn leaves are fading rather quickly…oh what am I going photograph for future lessons. 🙂
Thank you for explaining. Autumn leaves don’t last at all. You really know how to capture the beauty of leaves! 🙂
For the shots you have displayed the f7.1 may be better aperture. And also note generally all lenses pretty sharp at this aperture. Use wider apertures when you have flatter subjects.
Don’t worry about the leaves fading faster, you will get the chance to shoot dry trees and the snow soon! 😀
Thanks Brenda for the participation. No its never a late to submit. Great to see you here.
Set 1: Yes, your thoughts are right! Definitely, the image needed the colour saturation adjustment and you have done well. Whenever you have a photograph with lots of colours especially the nature shots one must do this adjustment. You are right in the last pic with f4.5 rendered a better background separation too. That is the ideal setup. However, the pic 3 does not show the sharpness what pic 2 is able to show. Maybe a motion blur because of the wind? Or a camera shake? I liked the bokeh it created even at f9!
Set 2: The original raw picture is kind of very soft and looks like there was a wind breeze again. Also, the f 1.8 is not an ideal setting for this shot. F1.8 has very shallow DOF and in this case, we needed better depth to cover the whole of the leaves in the branch. Whereas the 3rd pic with f7.1 done a great job. Always think about the focus plane when using wider apertures. Also, remember as you are closer to the subject your DOF reduces.
Set 3: Yes you are right the third picture looks great. Again shallow DOF was the reason why the pic did not come out well. If you check carefully the further away leaves from the branch you are trying to focus, are blurred and its blending with the background, this creates the confusion. Whereas the third pic separates them perfectly.
Whenever you shoot with wide apertures you have to make sure all your intended subjects are within the focus range. Even when you are shooting a single flower in wide open aperture you have to make sure it’s within your focal plane. Check this ex where I used f 1.4 and able to almost put everything in focus. https://rkarkera.wordpress.com/2017/10/20/seven-day-bw-photo-challenge-day-2/
Thanks Brenda for taking part. This critical review is part of XDrive’s Learning Photography sessions.
Raj
Thank you again for your constructive feedback. I find myself amazed at your perceptive abilities that “see” the wind breeze and sharpness variations…Wow! I find a repeating theme of “focal plane” which invites me to include in your next lesson. I am becoming less and less an accidental photographer and slowly inching towards being more intentional. I do hope you are having as much fun as I am through this learning/experimenting process.
Glad to hear that Brenda.. and thanks for your kind words of appreciation. But I am just like you nothing special, just that I have been carrying camera since long time and I do take keen interest in the subject. There should be explanation for everything and I try to give possible answer. 🙂
Looks like you missed this session https://rkarkera.wordpress.com/2017/09/12/learn-photography-9-focus/
Please go through that, it should throw some light on topic “Focus Plane”. Let me know if you need another session. I will do it. Cheers to you!
Thank you Raj. I’ll take a few moments and visit that session before working on the raw – jpeg photo lesson.
Not a problem Brenda… I feel the understanding of the “Focal plane” is very very important in my opinion. When you take advantage of it you can create great results from DSLR camera.
Having bokeh but sharp subject, focusing the subject is the key (?) I like the third one at f7.1, too. I just wonder if it is possible to achieve bokeh with wider aperture like 4.5, but leaves are as sharp as one at f7.1?
I’m thinking that some situations create bokeh through the interplay of light and leaves…this is just my hypothesis at this time. I’m motivated to explore wider apertures with an awareness of the focal plane. Will this create a sharpness of leaves and maybe fuzzy bokeh? Will see 😳
Amy I thought I responded to your comment, but it seems to have vanished. My current hypothesis about bokeh is that when photographing nature there may be a play between aperture settings and lights/leaves that create various renditions of bokeh. The concern on my part is management of the bokeh so that it adds magic and doesn’t distract or clutter the image. And I think f/7 and higher may tend towards clutter. I am pondering my need to understand focal plane with open aperture settings which may allow for sharp leaves as well as bokeh.🤔
Got it, Brenda! Thank you so much for your response. I want to apologize for keeping pressing the same question. You’re right, lights are also the factor. This is such a cool post, I’m learning so much here. Thank you, Brenda!
Oh please don’t worry…through the process involved in these assignments and comments I am finding great value. Let’s keep on, okay.
🙂 🙂
Good question, actually you can have a sharp focus with the bokeh… but .. it depends on so many things. It depends on lenses because 1) some lenses not very sharp at wide open and smallest aperture. 2) Soft at both ends of zoom.
In this case I am not sure why its not sharp though. But by carefully putting the subject into the DOF one can achieve the sharp focus and the blur. That’s what portrait photographers do. One thing to remember is, as you are closer to the subject the DOF is shorter, so you have to try at different focal lengths to achieve the sharpness. In case of prime lens one has to move up or down. Pro-photographer know these value at the tip of the tongue! DOF preview button on the camera should help too.
Looking forward to working this interesting assignment after tomorrow or weekend. 🙂
Brenda you have inspired me to take these lessons more seriously. I have to arrange my evening routine.
I am finding it to be a great learning experience and am grateful that there are bloggers who are open to sharing their expertise, experience, and time. Thank you for visiting.