Though I would hide it,
In my face it still appears–
My fond, secret love.
And now he questions me:
“Is something bothering you?”
~Taira no Kanemori

Nikon D750 f/7.1 1/3200s 85m 2200 ISO
Though I would hide it,
In my face it still appears–
My fond, secret love.
And now he questions me:
“Is something bothering you?”
~Taira no Kanemori
Nikon D750 f/7.1 1/3200s 85m 2200 ISO
The peaks of clouds
Have crumbled into fragments–
The moonlit mountain.
~Basho (Trans: D. Keene, The Narrow Road to Oku)
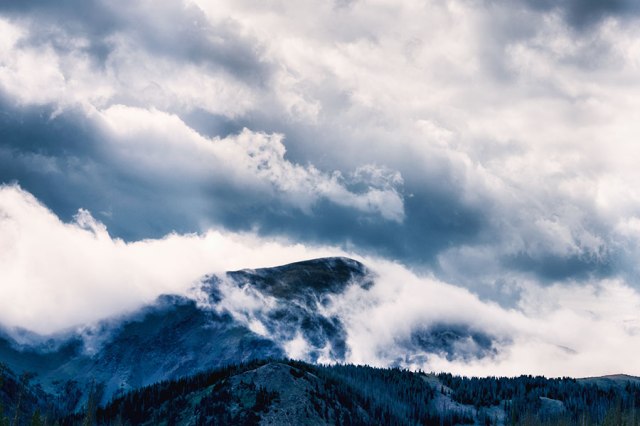
Cameron Pass… Nikon D750 f/7.1 1/800 80 mm 125 ISO

Sony RX100 III f/11 1/250s 25.7mm 800 ISO
Hop on over to Leya’s to participate in this week’s photo challenge: patterns

2012
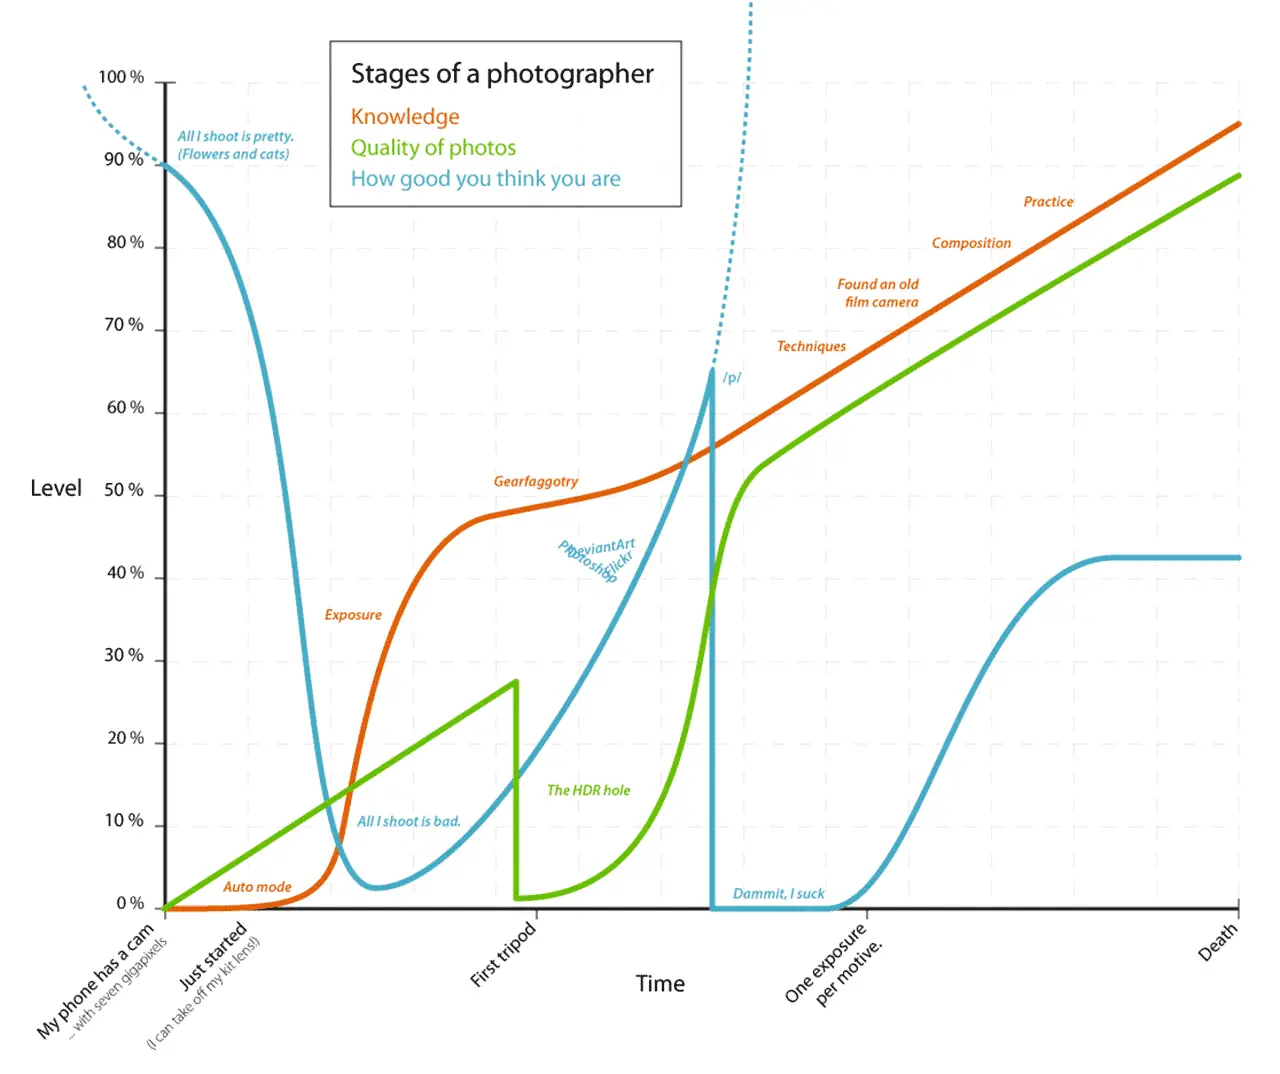
When I first saw the “Stages of a Photographer” graph, I laughed with the memories of expectations that came with my first Nikon purchase in 1984; in no time, I would be creating images equal to those in the National Geographic. Cringe.

2013
The Stages graph inspired me to explore Youtube videos of photographers who share their learning journey and this search led me to the website, Japan Camera Hunter who features Dan K’s, A Learning Framework for Photography.
2014
Step I Get an Eye for Photography
A reasonably acute Artistic Eye should be the fundamental foundation upon which your photography should be built, rather than something you will get round to once you’ve topped out on your technical expertise.
Focus, sharpness, depth of field, lightening, color, all that kind of thing is embellishment. Even composition is subordinate to the engagement, to the message and to the reaction that you hope to elicit…
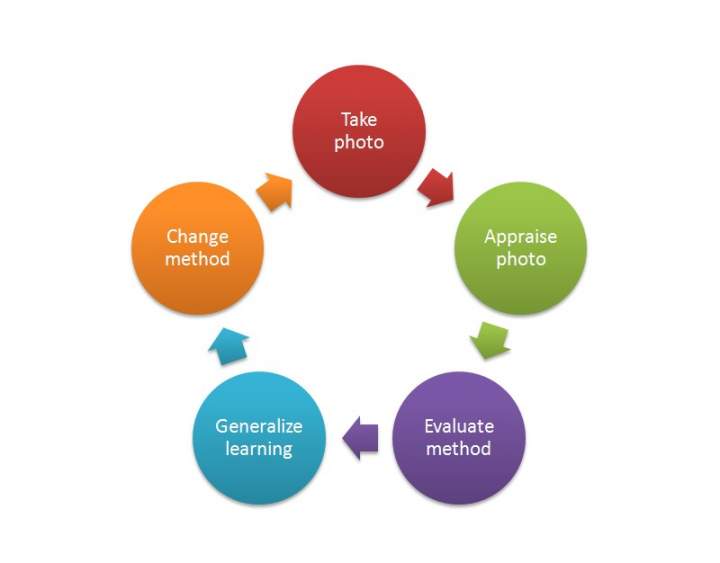
Feedback and learning is what separates an improving photographer from someone that sprays-and-prays but never improves…the learning process never finishes.

At the end of this step you should have a fair understanding of what an interesting and compelling image looks like and how to make one, even if the execution is rudimentary.
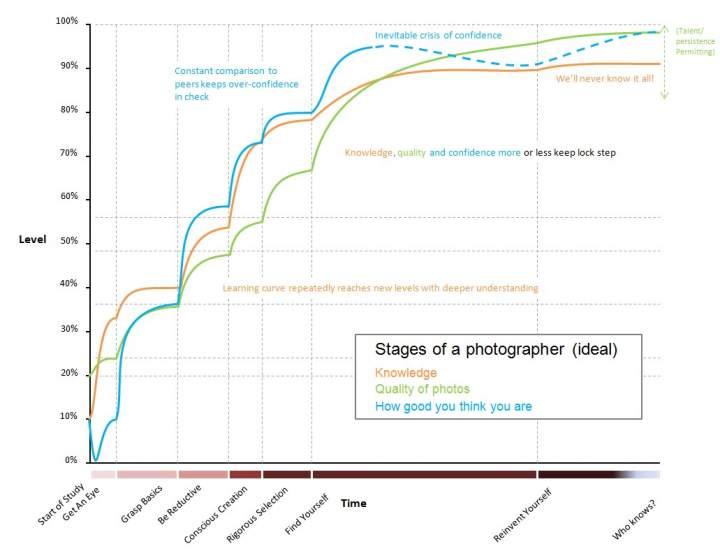
By starting out right, with an understanding of what a good photo looks like, confidence may take a beating at first but you’ll be on the right path with less time wasted with follies into unnecessary gear or special effects.

2018
Dan K’s learning steps 2 through 7 guidelines will be covered in next week’s A Photo Study. If yo wish to share, I would love to hear about or see examples of your personal photo journey. Let’s tag with #aphotostudy.
I hope you enjoy Sean Tucker’s personal narrative of his journey
“We must look deeply to identify the real suffering of our times and to understand how it has come to be. Our modern way of living brings tension, stress and pain to our body; we are exposed to anger, violence, and fear; we live with the threat of terrorism, the destruction of the ecosystem, war and famine, climate change, the economic crisis, recession, poverty, social injustice, broken families and divorce, and so much more.

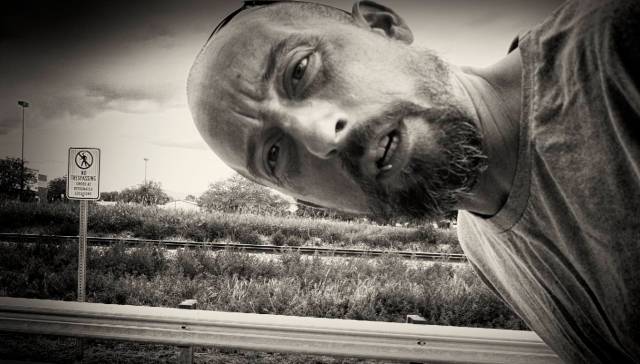
Toy Store… Nikon D750 f/1.8 1/25s 35m 100 ISO
How are we living? How are we consuming? What violence, fear, and anger are we ingesting every day through the media around us? How is our lifestyle polluting the environment and creating a toxic level atmosphere for our bodies and our minds, for our families and for future generations? If we can call the suffering, the real ill-being of our times, by its true names and if we an see how it has come to be, we will know exactly what kind of medicine, what kind of healing we need in order to deal with it. The truth of ill-being will reveal the end of ill-being.” ~Thich Nhat Hanh (The Other Shore)

Sony RX100 III f/11 1/250s 25mm 800 ISO
Gone down, I thought–
’til the moon emerged again
between clouds
~ Shua


contemplative photography….iPad f/1.8 1/800s 20 ISO
Earlier this week, while watching the forever changing clouds that journey pass my home, I remembered the fascination, during an undergraduate psych class, I had with the Rorschach Test. This projective psychological test, commonly known as the ink block test, was developed in 1921. In 1943 the US military implemented the Harrow-Erickon Multiple Choice Rorschach Test for the large scale screening of U.S. military personnel. While the first outcomes reported impressive predictive power, later work showed that the test had very limited value.
What do you see in this image of clouds?
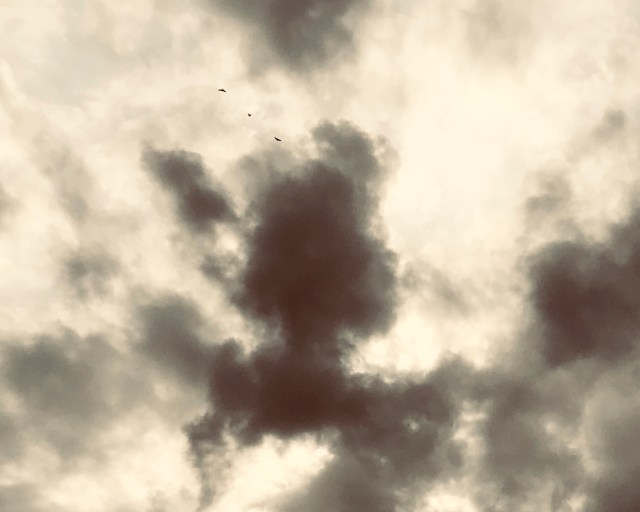
Image submitted in response to Jenn’s, Traveling at Wits End, challenge to “get out of the box” and create an image that looks like something else or looks different than it really is.
A series of photographs has the ability to convey a story through the inclusion of emotion, mood, ideas, and visual narrative.
Five basic elements of story photography are:
The introduction – an image that identifies the important characters while giving information about the context of the story and introducing the theme. The first image should also be compelling and invite curiosity so that your viewer is drawn into the story.
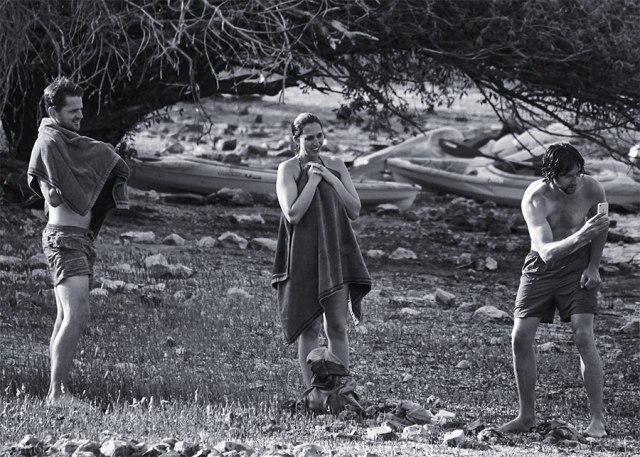
the gaze
The Plot – introduces ideas, feelings, experiences while exploring themes. Do not forget to follow the “rule of thirds” as this will definitely isolate and immediately draw the viewer’s attention to your subject.

elsewhere
Varying characters’ perspective – photograph closer to your subject(s) or further away. Photograph from multiple angles to find which angle best communicates your story.

watching
Stages – show images taken at different times/stages of the photo session. Explore which subject needs to be included or excluded in an image.

connecting

looking away
Focus on detail – you can also tell a story by paying attention to detail. When photographing outdoors, make sure the sun is behind you or off to the side.

disconnected

exclusion
Photo editing – ensure there is variety among the images to create interest while at the same time link them together by processing them in a similar manner (black and white, lightening).

distancing
If you chose to caption your photos be sure to take note of what the subject(s) are doing without giving it away. Cations should be short, clear, and simple.
Projects such as story telling, variations, and photo series are excellent learning experiences because they help explore creativity, encourage you to compare your work with earlier photographs and allow you to see how your ideas and techniques evolve over time.
I love a great story…do you have one to share? Let’s tag with #aphotostudy.


You must be logged in to post a comment.