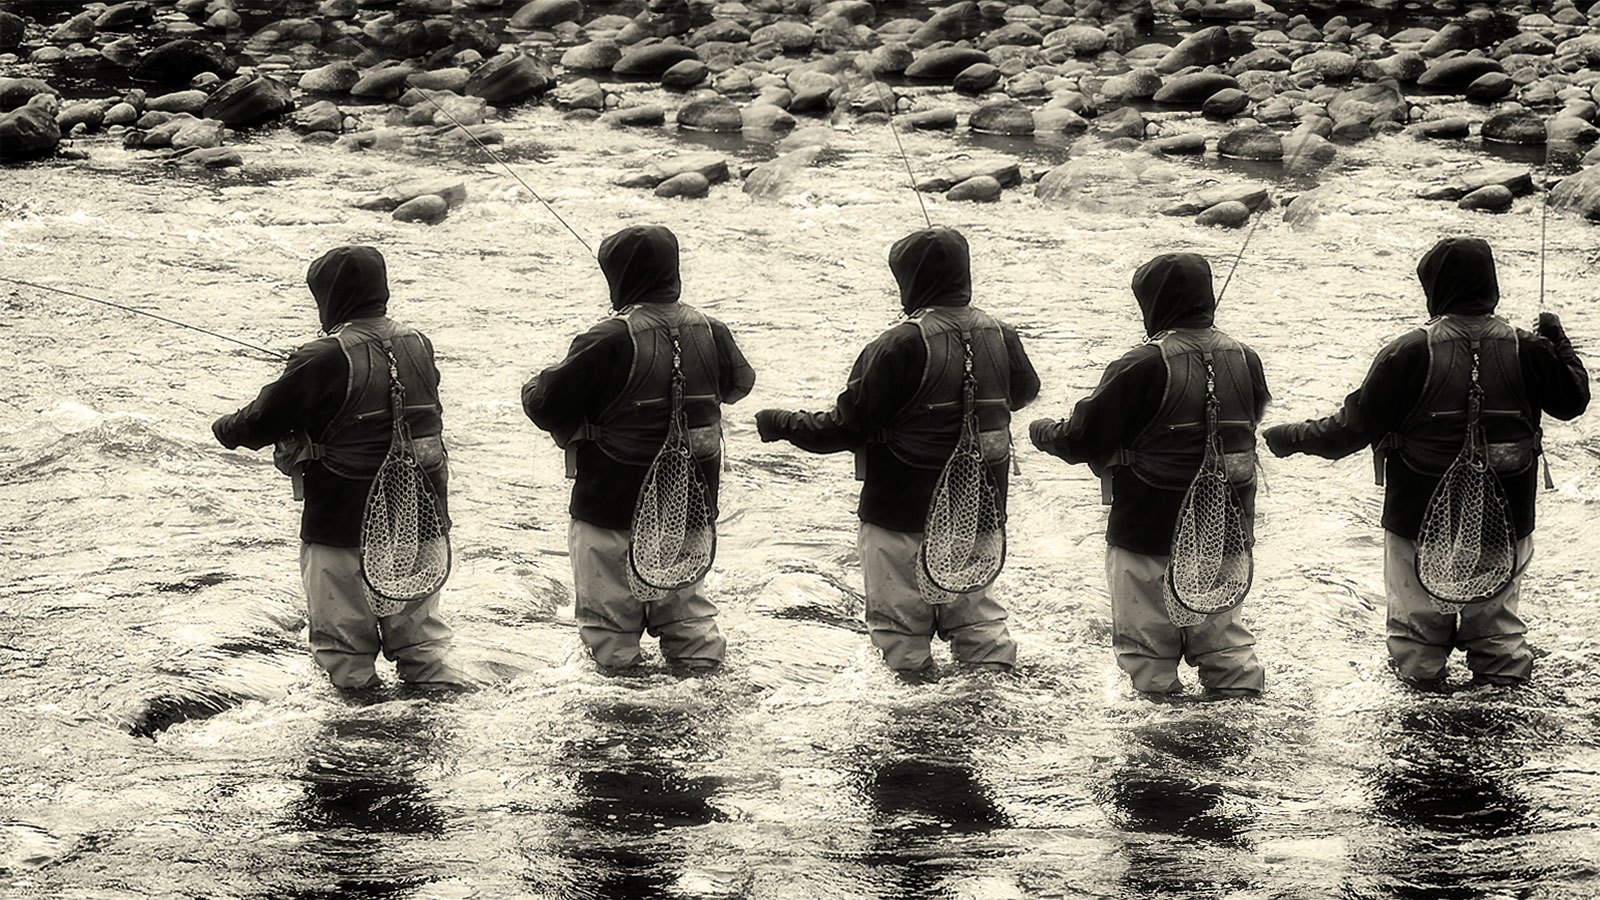
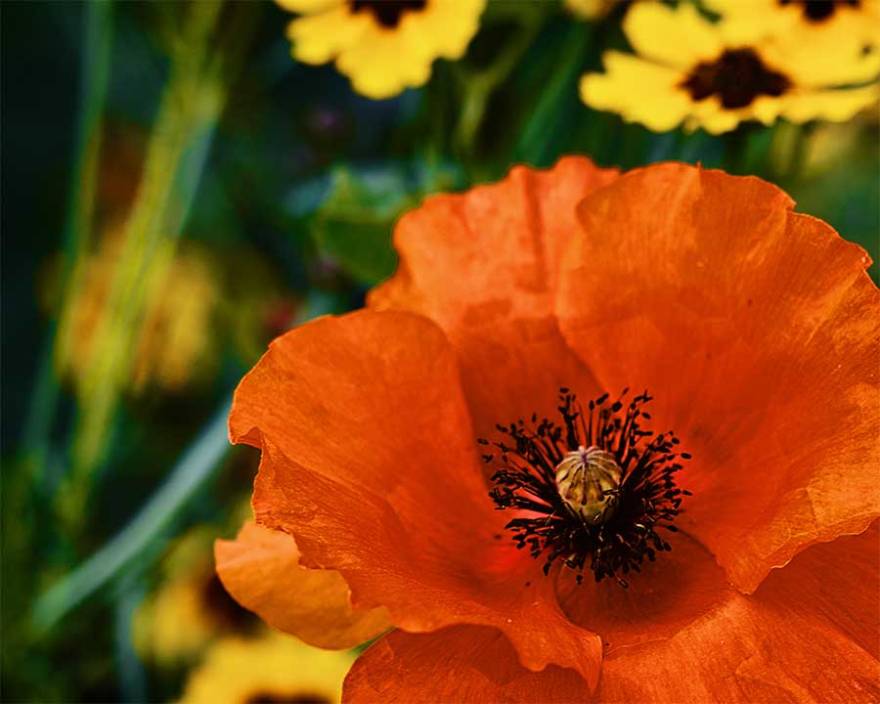
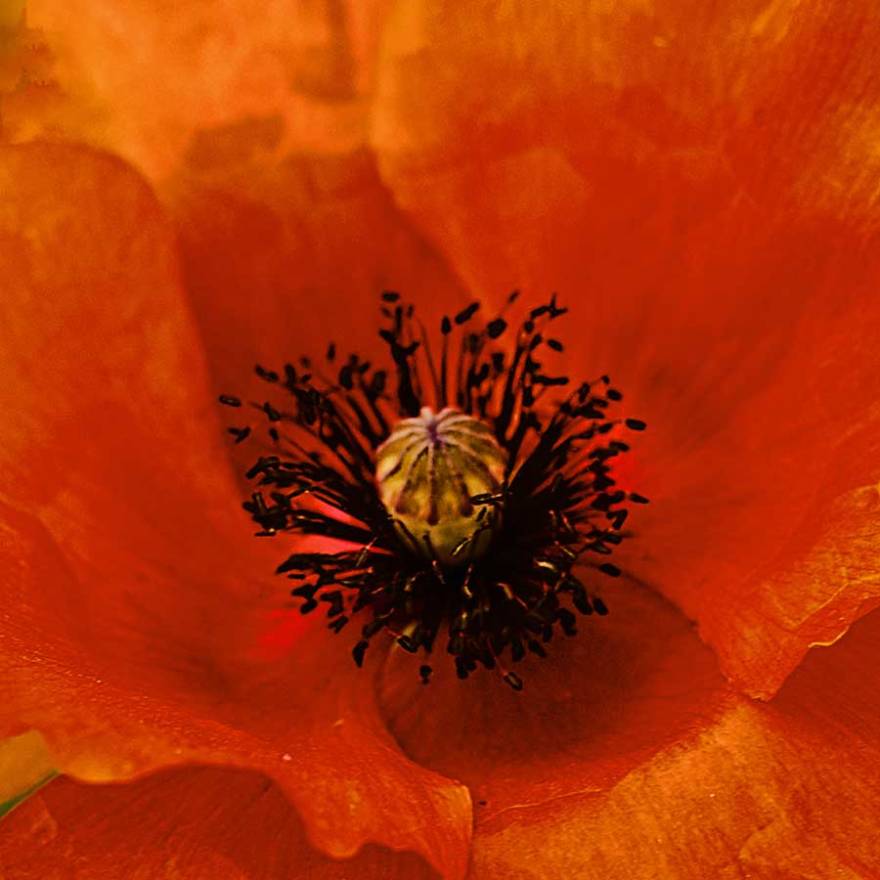
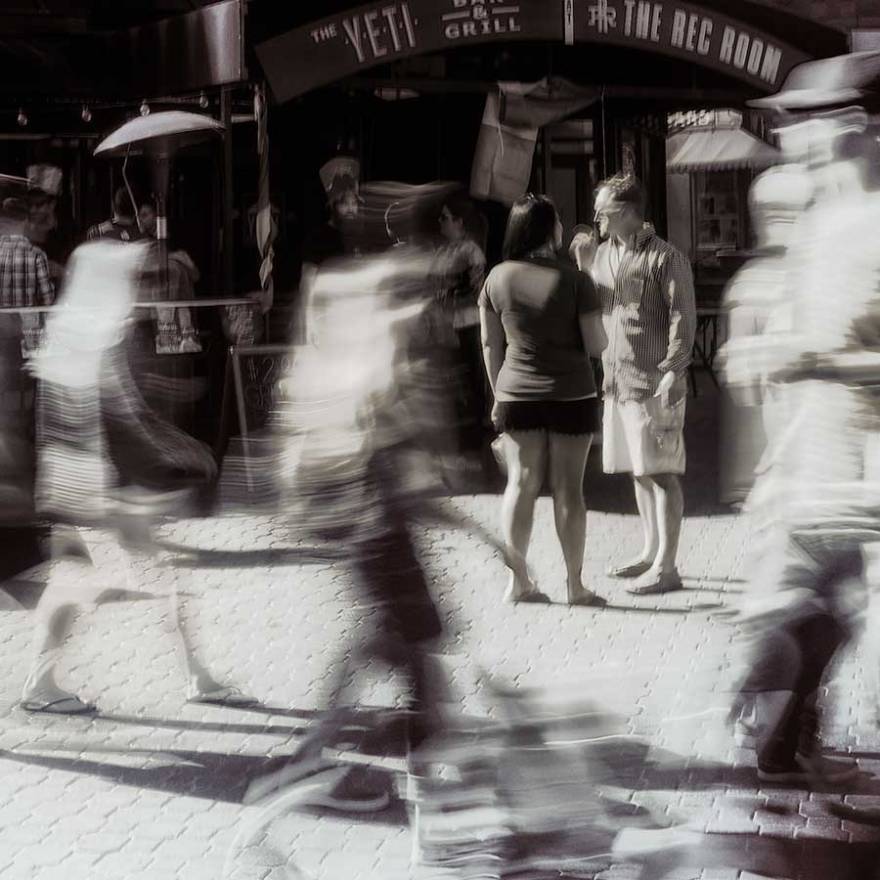
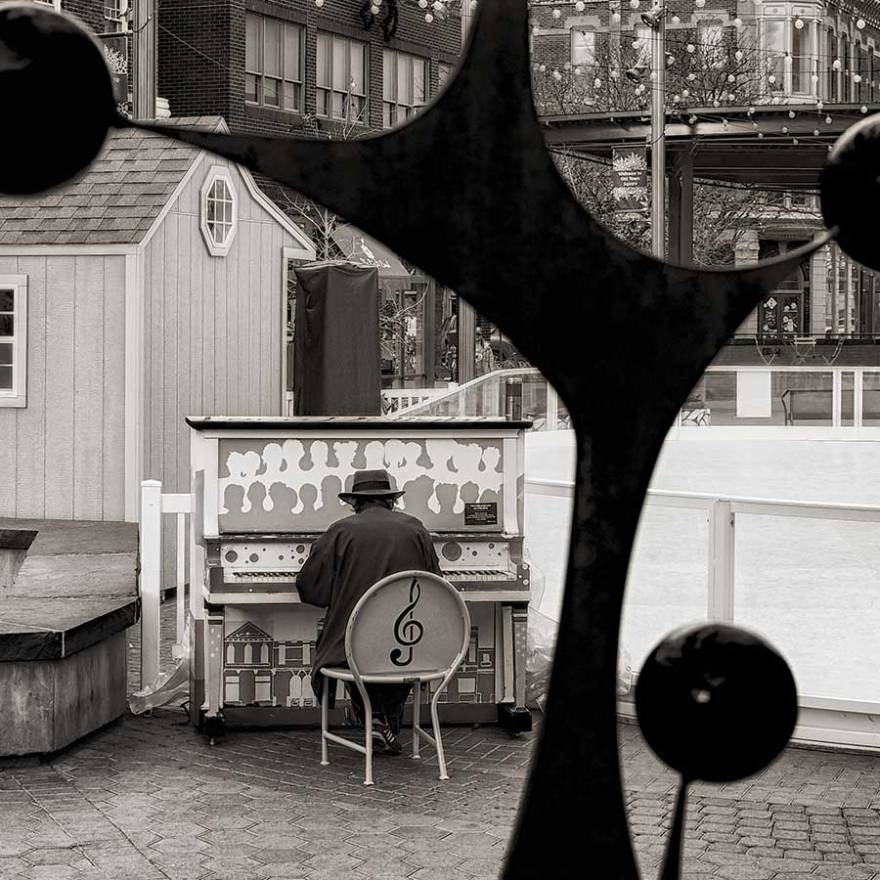
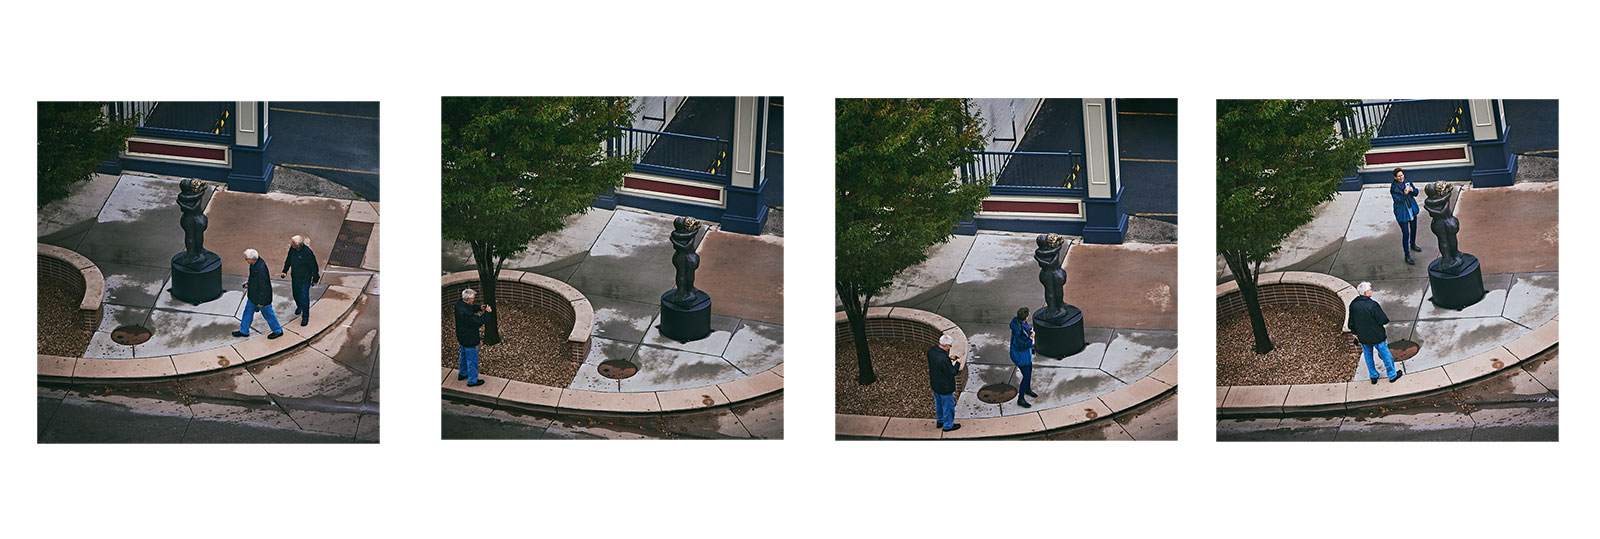
Week 11 Composition: Fill the Frame: (Using Fill the Frame is a great way to isolate your subject and create interest in your photo. Can you do it with only one color in the frame? Fill the Frame with one color.)
Image submitted in response to Dogwood Photography’s annual 52-week photography challenge.
Today, is one week shy of my year-long photo study project! I began this blogging journey with the intention to explore, experiment, and learn about various aspects of photography.
Through the unparalleled sharing of knowledge Ted Forbes’ offered through his YouTube videos, The Art of Photography, I was able to set out learning about the basics of composition within photography: the rules of thirds, odds, and space; as well as, the elements of lines, shape, simplification, negative space, repeating patterns, sub framing, and triangles. And from this ground work we explored perspective, seeing, low and high angles, tone, color theory, and the characteristics of light.
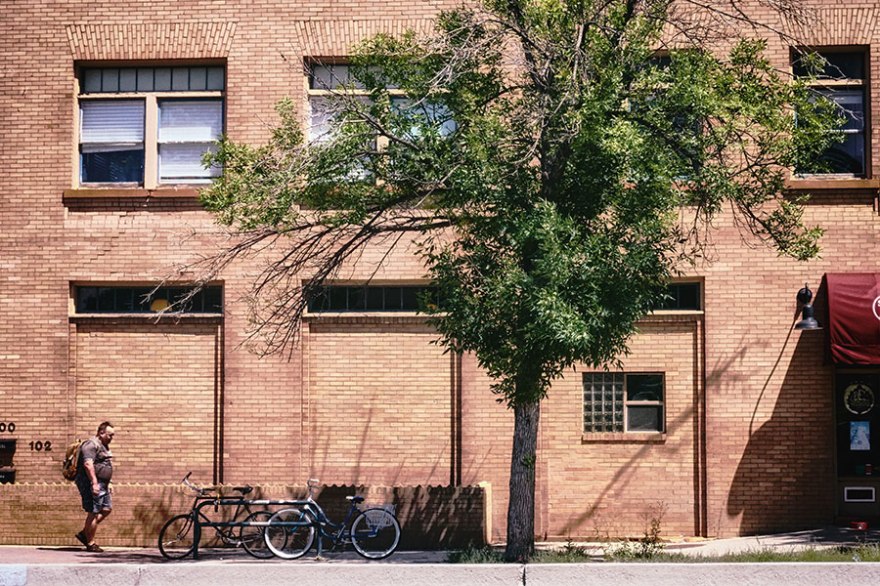
Sony NEX-5N f/6.3 1/400 186
The genres of abstract, landscape, sequence, contemplative, and street photography were introduced with the assistance of photographers such as:
Four posts ‘focused” on The Photographer, the person who stands on one side of the photography triangle which supported the Developing your Photography Style exercises. These 4 posts were drawn from Ted Forbes’ Master Class Live series in which photographers were offered exercises designed to exhaust all possibilities in order to awaken our unique individuality.
And yes! Throughout the year there were exercises that I undertook with an egg, or two, or three as the subject.
iPad f/1.8 1 sec ISO 64
This was an autodidactic journey undertaken to share and expand through exchanges with others. Each posts defined the next topic throughout this project. It has been both a challenge and fun. You will find each of the post listed as standalone lessons on the home page under A Photo Study.
Was there a specific topic or post that you enjoyed the most, the most beneficial, the most challenging? I would enjoy seeing 1-7 of the images you created during the past year. Let’s tag with #aphotostudy.
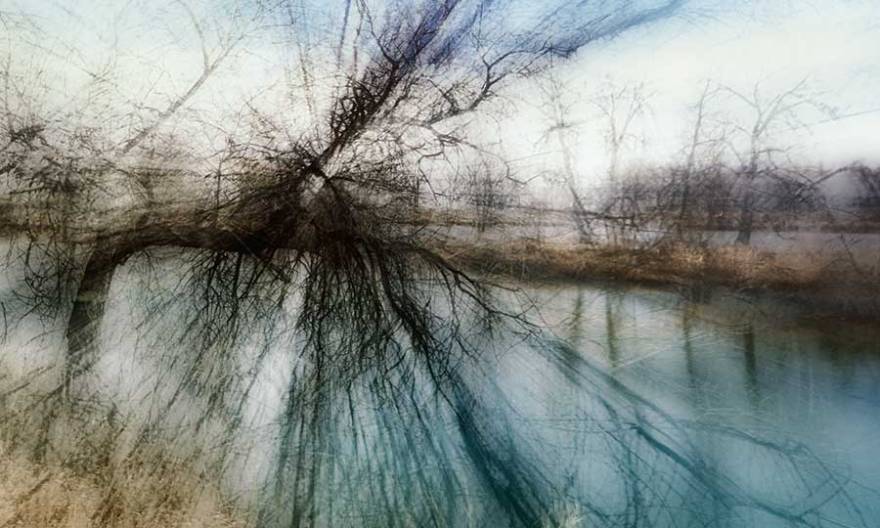
As I review the blogs posted in August, I noticed an increased shift away from black and white images to color. I attribute this to the increased “focus” on the various elements of contemplative photography and an intention to seeing what is as opposed to compositional elements.
April stirs my slumbering hunger for color to counteract the depressive yellowish-brown, tired, and bare world winter leaves in its wake. Growing up in the western part of Colorado, I wasn’t aware of how brown, dry, and “un-alive” this state can be until I saw Southern California’s multiple shades of green from the window of a plane and felt the amazing touch of the ocean’s breeze as I left the airport.
As I reviewed the blogs posted during April, I found that some of the composition elements that my photo study explored were:
rule of thirds
photographing red
the photographer – “point of departure”
“From now on, before I go shoot, I’ll consult internally to focus on one thing I want to capture, and have that point of departure. It’ll give purpose to my work and me being out there. The advantages are that I’ll learn patience, presence and a deeper sense of observation. This is a powerful and deep message…have a point of departure.” ~Ralph Gibson
My favorite parts of blogging is the sharing of photographs and reading the thoughts you share in the comment section. This ongoing exchange is like an ongoing virtual trip through various countries and ideas that result in an expanding worldview. Thank you.
March is that time of year when the promise of spring begins to be seen in the subtle transitions of yellowish-brown to green, tree buds, bicyclist, and clothing. With the sounds of rivulets created by melted ice and snow, my soul also begins to thaw.
The photo study project for this month included:
rhythm & tone
rule of space
abstract photography
While I understand that tone and rhythm are found with repeating patterns, I still struggle with the transition of these elements from music to photography. Oh well….maybe one day there will a moment of enlightenment in the early morning hours or during a morning shower.
When you look back to March, did you find a theme or a project that guided your photography?
A life review, a year review, an anniversary review, a retirement review, or a graduation review invites us to reflect upon memories and begin a private process of shifting through remembered moments as if they were grains of time in which we place into value-laden categories that generally fall into piles of “good”, “bad”, or “indifferent.” This is the ground work for the emergence of future plans, goals, and yearly resolutions.
Photography, through its visual recording of time, offers a quasi-concrete way of revisiting our yesterdays. It is the coming together of aged and blurry photographs and shared family stories that have formulated and validated the pre-memories of my childhood self beyond my birth certificate and my parent’s marriage certificate. As an aside, I have wondered about the impact cherished family photos have on remembered and shared childhood memories especially in contrast to the time before photography when family stories, diaries, paintings, drawings, songs, biblical records, and cemeteries were memory keepsakes.
At this time, I thought it would be interesting to do twelve photo review blogs of the images created during 2018 as part of the aphotostudy project I began last January. I would love to have you join me and share the photographs that highlight your blogging journey through 2018.
Also, as this year fades into memory and opens a door to 2019, I wish to express my gratitude for all of you who shared your creative endeavors, knowledge, and thoughts throughout the year. May each step you take throughout the coming days be accompanied by love, joy, and peace.
Ted Forbes brings his Master Class Live series to a close by identifying a number of important reminders for amateur and professional photographers:
photographs come from your mind, your talent, your skill level, your experience, your sense of creativity….
…what you are as a photographer is a sum of all your experiences and everything you have done up to this point comprises your skill level.
…the camera doesn’t make images you do
Developing your style as a photographer is:
…an ongoing process…this is something that you get better and better and better and better at, and I think, hopefully, one day you get really good at but it never stops….
Exercise 1:tell a story without words
identify a story or how-to-series you would like to create
use your camera to create a series of photographs
use as many perspectives as possible
keep it simple
think about composition, that is how could various elements assist in telling your story
create a lot of images…15-30+
edit the series of images
identify those that specifically show what you are trying to communicate
removing those that are not essential in the story’s key points
edit again to pare the number down to as few as possible.Can you remove all but one and still tell the story?
The absolute goal of this exercise is to tell a story with one image that interacts with a viewer and evokes an emotional response, a reaction, or a change in perspective, thought, or understanding.
A number of various genres that may inspire you are:
…what we’re doing here is getting you to think…over the course of a long period of time you may see some of it very quickly, some of it in a matter of weeks, depending on how hard you work, it may be a couple of years before you start really feeling like you defining yourself as a photographer…the catalyst, which I think is really important…what we are looking for right now…is to get you to start thinking differently…
The first part of this Developing Your Personal Styleseries invited us as photographers to learn how to see and think–visualization. The second encouraged us to utilize the meditative process of concentration and returning to the object as a means to extend our creative endeavors by encouraging us as photographers to “exhaust all possibilities”and “to train the brain to think.”
This week Ted Forbes has offered three separate photo assignments that blend two things together…emulating an identified feeling state of experience and engaging with a subject in such a way as you create a portraiture that represents an identified feeling.
Exercise 1:
Start with a basic feeling…identify an event or something that happened in your life that is associated with a feeling — happy, angry, sad, worried, etc.
Visualize and mediate upon this feeling state.
Get your mind to think differently….how do I bring that certain feeling into an image?How do I just shoot something that represents that state of experience?What do I need to do to get that feeling to be represented in a photograph?
Replicate this feeling through a still life, landscape, or abstract image.
Don’t expect to be good…it takes time to emulating feelings.
The initial photographs we create during this time “…may not be great, but the whole point is [we’ve] got [our heads] thinking and [we’re] getting [our] mind around composition and possibilities and that’s what’s really important…”
This slideshow requires JavaScript.
Exercise 2:
Go to the library or book store and find a photo book of a photographer whose work touches upon the multiple emotions within the human experience; e.g., Cartier-Bresson, Walker Evans.
Ask yourself what is it about this photographer that inspires you to start seeing the varied possibilities of photographing and evoking feelings.
Remember you don’t have to try and be like him…just see the possibilities.
Create a portraiture of someone that demonstrates an identified feeling state.
Engage with your subject, share what feeling state you wish to convey, develop a sense of trust, be like a movie director encouraging an actor to communicate a specific feeling.
Keep in mind
there is discomfort for the viewer when she can not see someone’s eyes.
people communicate emotions all of the time through their facial expressions and body postures.
interacting with people will help increase your comfort level
experiment with how to evoke feelings of people so that in time your work demonstrates your individual touch and people will “want you and no one else.”
This slideshow requires JavaScript.
I hope you will enjoy these challenging exercises that encourages us to stretch our imaginations while creating images that represents your personal style. As always, I’m looking forward to seeing some of your work and reading your thoughts. Let’s tag with #aphotostudy.
This week’s a photo study continues with Ted Forbes’ Master Class series, Developing your own Creative Style.Last week’s blog reviewed and invited us to open ourselves to visualization by remaining in a selected location, without a camera.Within the second episode, he defines meditation and then offers two exercises designed to increase our awareness of mediation within the creative process.
In the world of photography, mindfulness has been described as “meditative” or “contemplative” photography.
While out on a photo walk, my eyes scan the environment, searching for that something (shape, patterns, color, light/shadow, story) that draws my attention or for the perfect background scene.As I move through my environment, my mind begins thinking about a photo article I read earlier or an image created by one of my favorite photographers.I then consider the various camera settings and variations that may help me recreate an image or avoid repeating a past mistake.For a moment or two, I ponder about what kind of image would be a great accompaniment with a particular haiku.I begin composing and designing my next post which then invites me to slip into a fantasy about recognition and praise and then silence an inner smile as unease creeps in with, “Most likely your pictures will not be good enough”
All of this invites me to question, “Am I really on a photo walk or am I engaged in a private screening of movies of my own making?” This mindlessness chatter of thoughts, expectations, and desires are like dense clouds that prevent me from really being present with and seeing the world around me.To see requires a meditative mind.
For some people meditation is shrouded in esoteric mystery.Others understand it through images of a person sitting in the lotus position with eyes half-closed.Others associate it with holiness and spirituality.In its most general sense it is deciding exactly how to focus the mind for a period of time and then doing just that.
In theory, focusing the mind upon an object sounds very easy, but practice acquaints us with a mind that seems to have a will of its own as it drifts from one thought, image, conversation, or memory to other remembrances, conversations, concepts, and thoughts.This internal stream goes on and on like a personal conversation with oneself or a perpetual story upon a movie screen…
…at the point when one realizes that the mind has traveled here and there, one is simply to note this to oneself and with acceptance gently return again to the meditative object…cited: A Meditative Journey, b c koeford
This slideshow requires JavaScript.
Even though they may not specifically use the word “mindfulness,” many of the great masters talk about photography as awareness of the present moment in which we forget ourselves. We let go of the goals, desires, expectations, techniques, and anxieties that make up who we in order to more fully immerse ourselves into the experience of seeing. We open up our receptive awareness to what the world offers us…. We’re not looking for anything in particular. We’re not going anywhere in particular. We’re not expecting or trying to control anything in particular. Instead, we’re wandering, perhaps rather aimlessly, without a goal or purpose. We’re fully and naively open to the possibility of the unexpected, the unique, the moment when things come together… to the flow of life. Under these conditions, when we let go of the self, “it” appears to us. We don’t find and take the picture. The photograph finds us. It takes itself. We unite with the scene not so we can see a shot we want, but rather what the scene offers. The experience comes to us and the photograph is simply the icing on the cake.cited: http://truecenterpublishing.com/photopsy/mindfulness.htm
In photography, mindfulness is like observing something for the first time, even though you may have looked at it a thousand times before.
With an understanding of the importance of returning, again an again, our concentration to the moment, Ted Forbes invites us to
1. Spend 30 minutes to an hour creating a still life.
Use an ordinary everyday item
focus on that one object
exhaust all the possibilities
when you become aware that you mind has begun to wander then—with acceptance—just return to this still life project
ask yourself what am I not doing, what if I introduce motion? what would be different if I would do….? what would this look likein different location—outdoors, on the floor, different table?
if it seems as though all possible angles, ideas, etc., have been exhausted, remain focused on the exercise for the rest of the time by jotting down thoughts and engaging in visualization.
2.Spend 30 minutes to an hour with a building or an outdoor space. — If you have chose a building that is in a public space and not a building that may arouse anxiety, a government building.
sit and explore ways to photograph.
just remember to keep returning to the exercise when you mind begins to wander.
exhaust all possibilities
use your journal to write down your ideas, frustrations, future projects.
This slideshow requires JavaScript.
If you are interested in meditation within the street photography genre, I invite you to visit Keep the Focus website. The Keep the Focus is a project initiated by German Street Photographer Thomas Ludwig who wants to bring the benefits of meditation techniques into street photography. On the site he offers a free ebook. A Meditation Guide for Street Photographers
I enjoy reading your comments and viewing your creative work. Thank you for sharing. Let’s tag with #aphotostudy.
With five weeks left of this year-long project, it is the time to explore how we as photographers
…eventually get to a point where we are comfortable with a certain look, a certain subject, or genre. Our work becomes recognizably ours. Sometimes this is done intentionally, sometimes we become well known for a subset of our work and everyone wants more of it. ~Dan K (Japan Camera Hunter)
I found that Dan K’s last two learning steps — Find Yourself and Reinvent Yourself — dovetail nicely with the Master Class Live series that Ted Forbes created a number of years ago, Developing your Creative Style.
The first of this Master Class series, Developing your Eye, begins with an introduction of his intention for this four week series:
To introduce exercises that will help us improve our creative work as photographers and to encourage us to allow our images to emerge through the camera from the source of our individual selves:
silence the negative voice that demeans our creative drive.
accept and embrace the uniqueness of our individual selves absent a tint of arrogance.
find our own creative voice.
To understand photography as an art form
Photography is:
a representation of an idea that is created using light sensitive material.
a visual recording of a scene that is reconstructed in the darkroom or in a software program into a a final image.
a two-dimensional representation of a three-dimensional space created through the use of contrast, lighting, and depth of field.
the combination of light through a lens or pin hole with a chemical process, silver gelatin or other materials, or digital process.
a continuum of creative endeavors that extend from commercialwork to fine art.
Visual art is:
the organization of visual elements in empty space to form a composition.
the use of visual elements such as, shape, line, contrast, color, object(s), light, empty space.
created with an audience in mind.
includes a degree of manipulation whether it is pre or post production.
composition that is created to evoke a reaction from the viewer — effecting ways of thinking, bringing awareness to social, environment, political, commercial issues, engaging through emotion, or creating something that is aesthetically pleasing.
on a continuum range of aesthetically to conceptual.
The materials used in the Master Class series are: a camera (exception for the“Wish I had my camera” exercise), framing template, small notebook, pencil/pen, photo browser software like Adobe Bridge that allows you to view images that do not have post adjustment tools.
Exercise I: I Wish I Had My Camera
tear down walls to get from the concrete to the imagined
This exercise is designed to encourage awareness of photographic memory through the use of a journal to record spontaneous creative ideas that generally fade after a few seconds and incorporate pre-visualization as a creative tool.It is common for creative people to experience creative moments during times of disengagement — in the shower, while falling into or awakening from sleep.
Leave your camera at home and sit for 30 minutes to an hour somewhere in a chosen location.Repeat 2-3 times in different locations.
At the beginning you may become bored, uncomfortable, and/or question the purpose of this exercise.Write down your initial thoughts/feelings in your journal.If it is boring, write down why.Jot down the feelings or thoughts that arise.
When you see something that catches your eye ask yourself why and get that in your mind.What is interesting about it?Is there a narrative or story here?How could you use this to create the perfect composition?
Imagine different composition elements: light, perspective, low-high angle, time of day, different weather conditions, etc that would bring about a perfect image.
Silent any negative reactions, or practicalities that block this creative play.
Journal your thoughts…short phrases, diagrams, and record them before they fade.
Be the camera and open yourself to what is absent of a chattering/planning mind.Did you notice something now that you did not initially notice?
If you remain in this location for at least 30 minutes, you will begin to notice things and say to yourself, “I should have noticed that.”
Ask yourself, “how can I make this more interesting?” Do I need to move to a different location?Write it down…write down everything that comes to your mind. Don’t be inhibited in what you write in your journal.Nothing is silly.Your words do not need to be beautiful, grammatically correct…you are just jotting down your thoughts, triggers, imaginations, questions.You are retaining the spontaneous, imagination, creative you.
Use your framing templates to experiment to see if there are objects that get in the way…to frame up the image…zoom as you move the template close to your eye or further away.
Sony RX100 III f/2.8 1/100s 25.7mm 800 ISO
…just let your imagination flow.If you have an image in your head it may take a number of times to create the image or it may even takes years.
Exercise II: Finding Your Own Creative Voice
Introduce yourself to the history of photography
Begin an exploration of photographers to find those who inspire you and influence how you see and understand photography.
Study their work and try to replicate their use of shape, line, contrast, color, object(s), light, empty space, composition, attention to detail, manipulation, use of tones, etc.
Recreate their work. You may begin by coping their work, but eventually use this as a door way to your own creative space
If you find yourself favoring one end of the conceptual-aesthetic continuum try exploring the other end.
I would love to read about your experience with “wish I had my camera” and about the photographers who resonate with your creative soul.Let’s tag with #aphotostudy.
The Master Class YouTube videos and the history video are around an hour long. I have found that it is difficult to sit and view a video for this period of time, so I generally break it down to 20 minute segments.
Below are the The Photographer posts that reviewed Dan K’s steps to becoming a better photographer.
My brain is tired.After fourteen posts in which my thinking/photographic self weaved in, through, and out of contemplative photography, I decided it was time to shift “focus” to the genre of street portraiture by inviting a number of amazing photographers to share their creative endeavors.
But first, what is street portraiture?
Well to me, a street portrait is just a photograph/portrait of someone you meet on the streets (stranger). Generally it is focused on their face, but doesn’t need to be. A “portrait” just means a “likeness” of someone. For example, you can shoot a “full body portrait” of someone, and you can also shoot a closeup face portrait of someone. ~Eric Kim
On the photo forums they are always debating whether street portraiture is street photography.
There are no hard and fast rules. But in general, if a picture contains a person on the street and is posed / staged, it is street portraiture. If the photo of the person is candid, it is street photography. Street portraiture may come under realm of street photography, but it is not to be confused with candid, non staged street work. Now, there are no photo police to decide such matters, so people are free to call em as they see em. ~ Daniel D. Teoli Jr.
Now let’s visit the website 123Photogo who shares with us that …character portraits is a whole different type of portrait photography, but, truly an art form that is just totally fun
I am looking forward to seeing one or more of your creative connection with people on the street. Let’s tag with #aphotostudy. Thank you for being a part of this learning journey.
The word photograph is derived from two Greek roots: photo or light, and graph, to write.
Throughout this learning journey, each blog emerged from the previous blogs creating an unplanned exploration of creation with a camera.Today’s blog which is being guided by H Zehr’s, discussion of light (The Little Book of Contemplative Photography) has suggested to me that an effective study guide of photography should introduce the topic of light as part of compositional and technical topics. Why?Because as Zehr writes:
To photograph is to draw with light. To photograph is to receive and hold light; a photograph is ‘frozen light.’ Light is the essence of photography.Without light, there is no photograph.
Light and its absence—shadow—are the essential building blocks of all images.
Light defines and reveals. It can convert drama or quietude. It an show texture or hide it.It can suggest warmth or coldness. It captures our attention, leads our eye.
Attention to light will…dramatically heighten your overall visual awareness and improve your photographic eye.
The Five Characteristics of light
Quantity:The brightness or dimness of light guides a photographer in her adjustment of aperture and shutter speed settings and use of a tripod or neutral density lens in order to provide the correct exposure and aid the photographer in creating her intention.
Quality:The hardness and softness of light.
Zehr writes, “The most emotive characteristic of light is it’s hardness or softness.On one end of the continuum of quality there is light that is highly directional and comes from a relatively small source (relative to the subject).Hard light brings out bright areas with hard shadow lines. Transitions from light areas to dark areas are often abrupt. Hard light can be dramatic, theatrical.
Soft light is diffused light. This is light created by a relatively large light source traveling through clouds or cloth. The light on an overcast day is diffused light,as is the light coming through sheer window drapes or reflected off light walls.Diffused light can gently suffuse the subject with light. Transitions from light to dark are gradual, with soft-edged shadows.Diffused light often provides better ‘modeling’ or three-dimensionality, because the light gradually falls off as the distance away from the light source increases.
3. Direction:Sidelight tends to show up textures because the light skims rough surfaces, causing rhythms of light and shadow that suggest three-dimensionality. Sidelight also maximizes three-dimensional of the subject.
Backlight may cause the subject to be outlined in light but, if there is insufficient light from the front, the subject may look too dark.
Direct frontal light lights the subject evenly, often minimizing three-dimensionality.
4. Contrast – the differences between light and dark areas within an image. A scene or image that has great differences between light and dark is said to be high contrast or “contrasty.” A scene or image the has less significant differences and more gradual transition is said to be softer or less contrasty. Overall contrast refers the extremes of light and dark in the image or scene as a whole. Local contrast refers to the extremes or transitions in some part of the scene or image.
5. Color – a characteristic of light that we often overlook because our eye makes automatic adjustments of which we are unaware. Films and digital sensors are sensitive to light color. The white balance on a digital camera attempts make appropriate adjustments.You may have heard photographers talk about the ‘sweet light” of evening – light that is warmer and more diffused than earlier in the day. Light color has some significance in black-and-white photography because film does not see color the way the eye does.
This slideshow requires JavaScript.
Exercise 1: Warm up exercise
Spend some time looking at a black and white photographto examine the light in the image and pay attention to the graduations of tones.
Where is the light in the image?
Where are the shadows?
What is the source of light?
What characteristics does the light have — hard vs soft, contrast, color
What shapes, forms, movements does the light create or suggest
How does the light affect the movement of your eye
What are the emotional effects of these characteristics of light
Exercise 2:Playing with Light
Photograph an object that you can move around
Photograph in a relatively dark space
Use one or more light sources; i.g., diffused light from a window that has some sheer material or bounce light off a wall or a white poster board. A directed or ‘spot’ sourcecan be created with a flood or spotlight in a clamp or a desk light.
Use only one light source at a time.Try shining the light from different directions (including low rand higher angles) by either moving the object or the light source.
As always, I am looking forward to seeing the images that you created as you played with light. Which light is your favorite? Let’s tag with #aphotostudy.


 The absolute goal of this exercise is to tell a story with one image that interacts with a viewer and evokes an emotional response, a reaction, or a change in perspective, thought, or understanding.
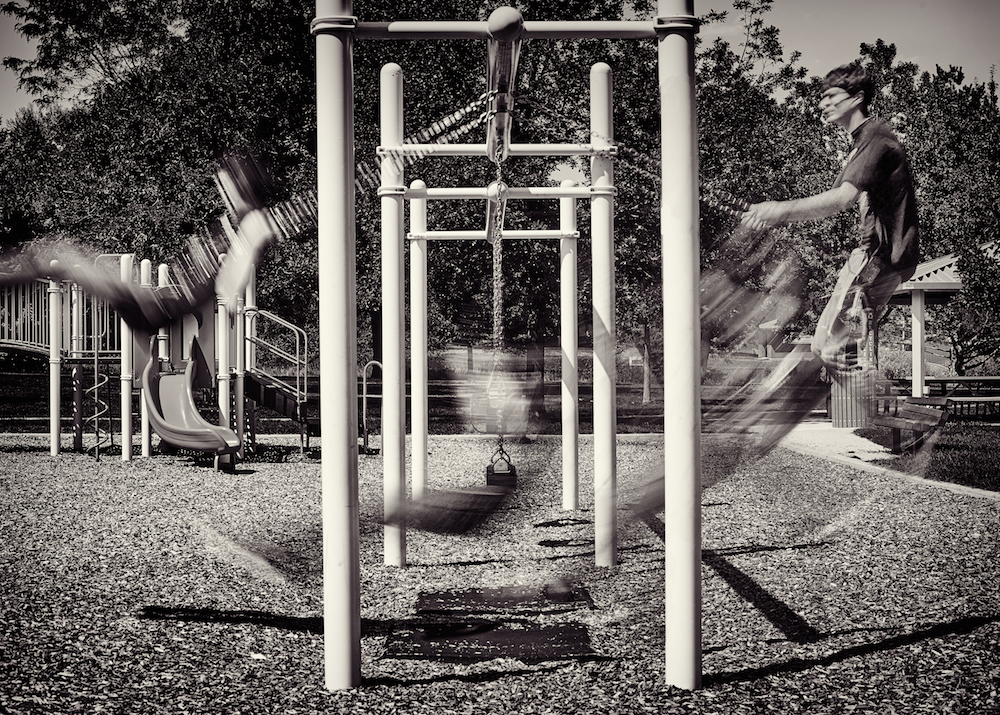


")


You must be logged in to post a comment.